Jennie's Blog Posts
my favorite tools
I know this post is a bit late, but here are my favorite tools, or the tools that I use the most often.

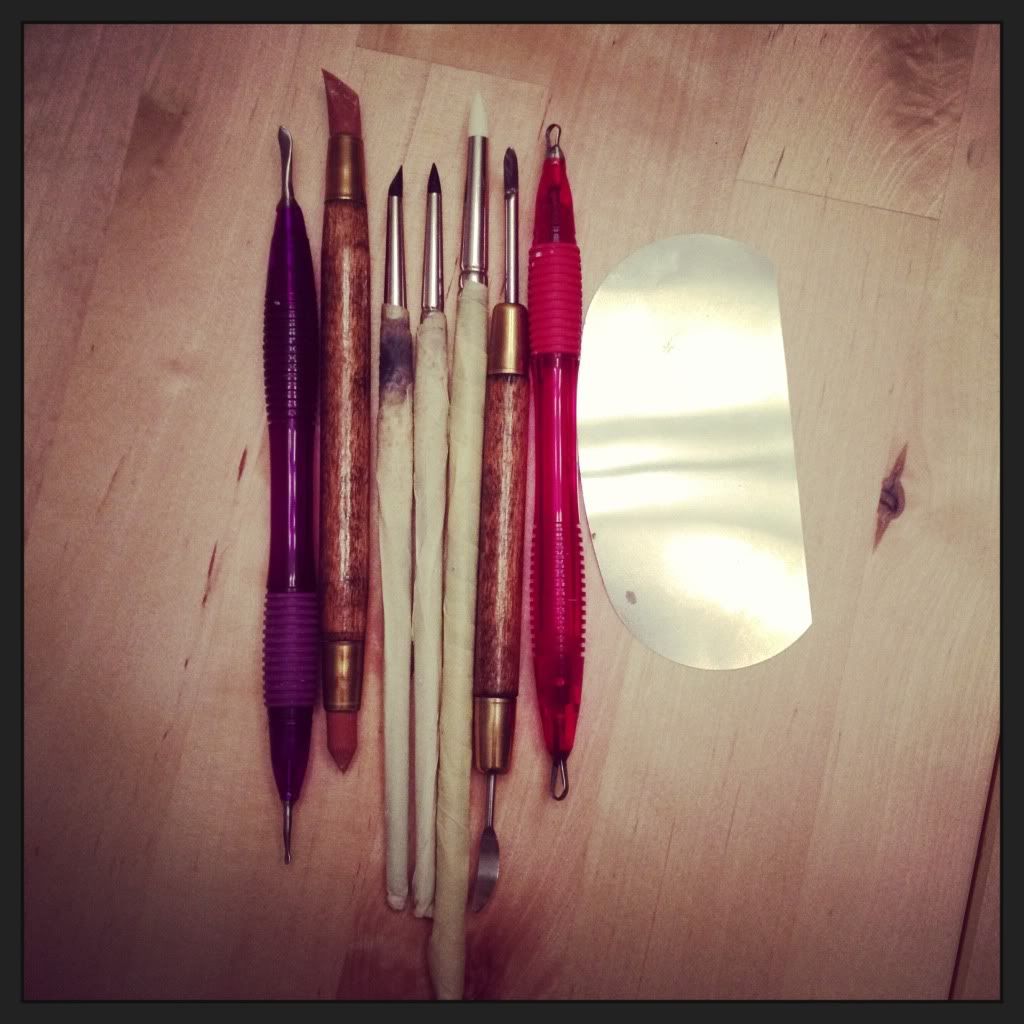
In order from left to right:
a) spoon tool (for smoothing and sculpting tight areas)
b) kemper angle tool (sculpting harsh lines and sculpting wrinkles before smoothing)
c) angle chisel shaper tool (sculpting wrinkles, side of nose and start of smoothing wrinkles)
d) taper point chisel tool (sculpting ears, mouth and other areas without harsh lines)
e) taper point large chisel tool (smoothing overall, my third step to smoothing wrinkles)
f) kemper johnston 3 in 1 tool (also for smoothing, defining areas and removing small pieces of clay)
g) clay remover tool (for removing clay where just smoothing it to the sides won’t work)
h) aluminum scraper (smoothing heads, cutting clay such as for fingers and toes)
Tape your tool handles!! The handles tend to smear when it comes in contact with clay oils, and that will end up on your sculpt. It’s why some sculpts you see have grey markings on them.
I know, it seems like all my tools are for smoothing. haha. For those of you who sculpt, you know that’s half the battle. The other half is making your sculpting look like the intended sculpt- whether it be a baby, fairy, or animal.
I kind of just grab whichever one of these will fit in the area that I am sculpting. For mini babies I tend to use a) and c) the most. For wrinkles, I use b) first, followed by smoothing with c) and then e).
I am a “builder” type of sculptor, I add clay where it’s needed and I don’t remove too much clay while sculpting. If you are the type to add to much clay to an area that’s where the “removing” tools come in handy. For example: You add a ton of clay to the cheeks and need to define the nose and mouth- you have to remove some clay around the nose (removal tool) and add some to the mouth (build with clay).
I hope that makes sense. I know a video would probably make this explanation much shorter, but I don’t have the time at the moment to edit a video. 🙂
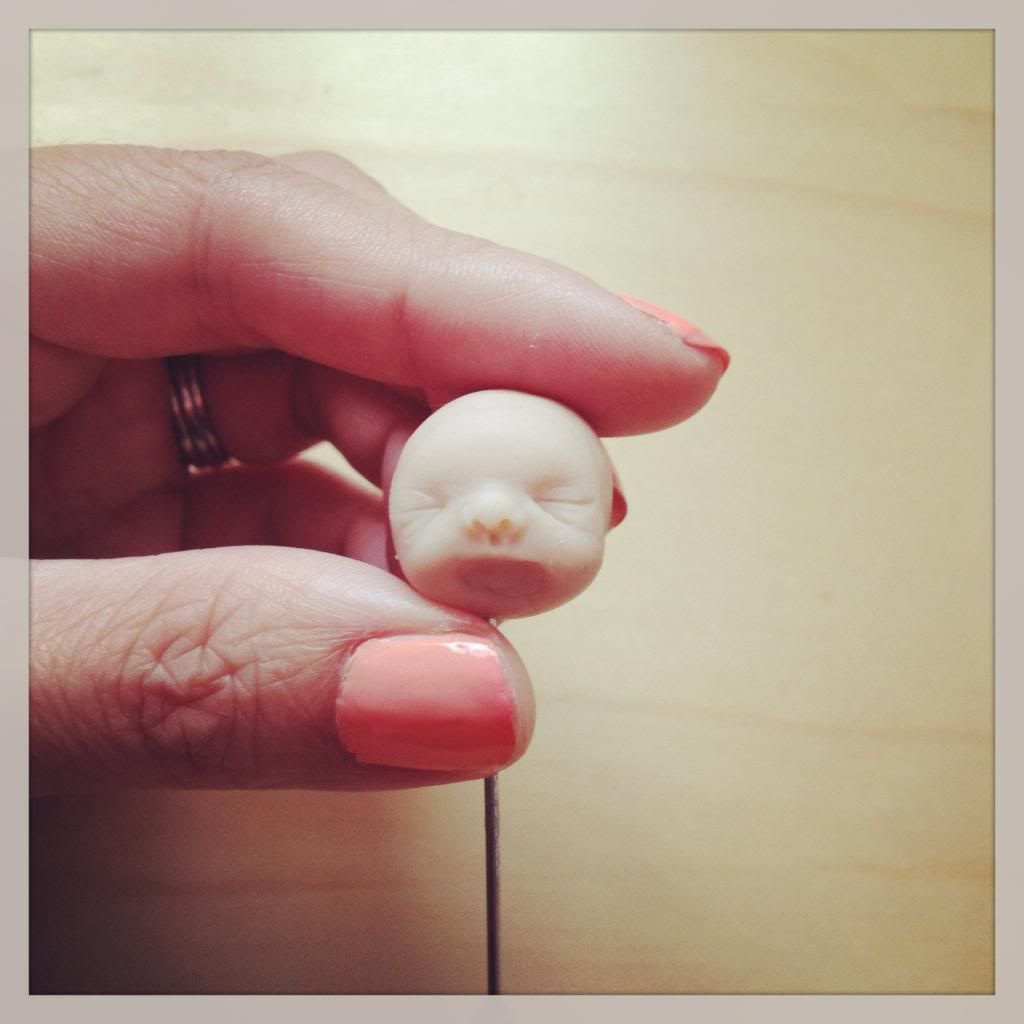
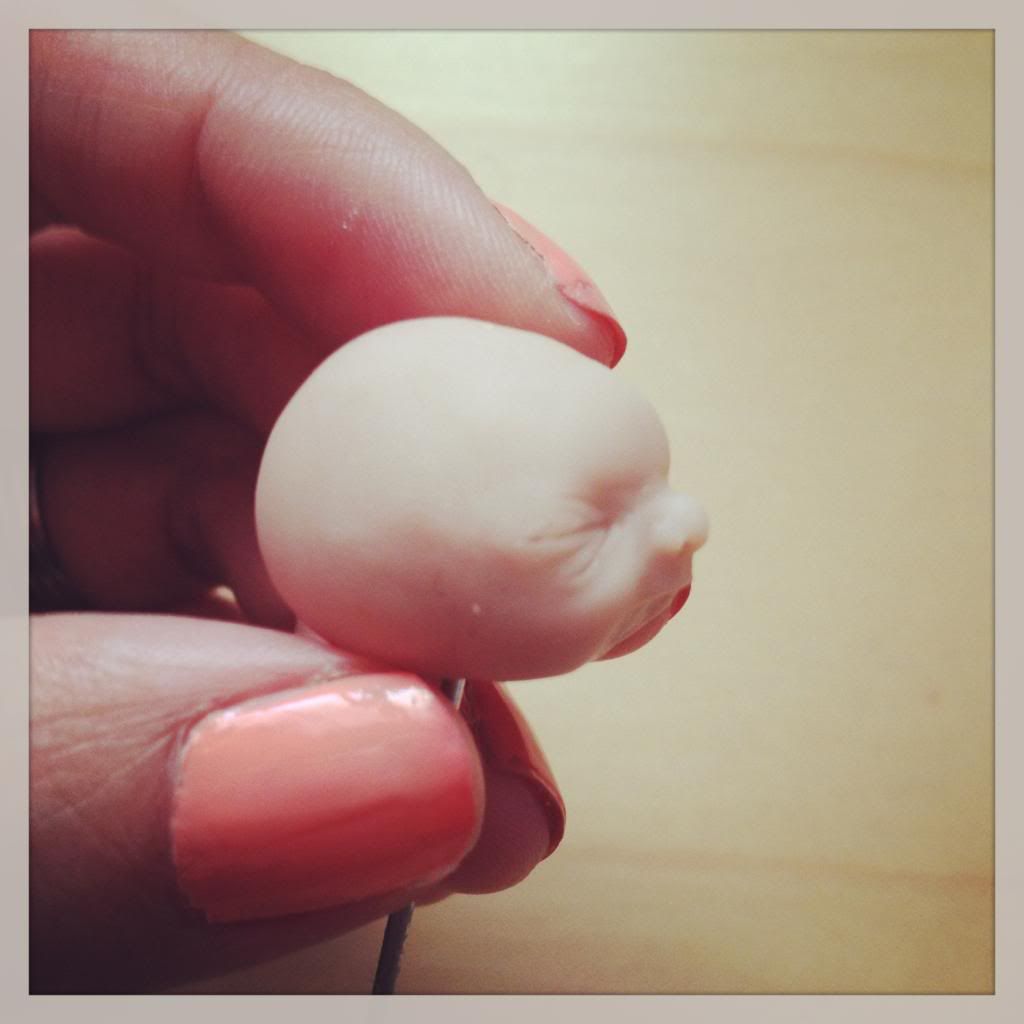
teeny sculpt in progress
Yes, I know I haven’t even finished the clothing for my newest sculpt, but watching all the videos from sculptuniversity I had to sculpt a lil one. A teeny weeny little one.
I like looking at sculpts in progress, so I thought I’d share this little one.


It’s still missing a mouth, and some more clay atop his/her head. Oh, and ears and perhaps a body. 🙂
What do you all think?
Also- FYI for the newbies, this is just the freshly baked head. I bake my sculpts in stages (series baking). Some people use a heat gun to “surface bake” the areas they like so that they can’t squish it. I just bake them in my lil’ oven. After the face is made I add more clay for the hair and ears so that I don’t squish the face as I sculpt the rest. Hope that makes sense!
sleepyhead
Another adorable free tutorial for my friends! 🙂

You can find the pictorial tutorial here.
happy sculpting!! I’m going to try to get some in before the night is done. I’ve been working on a mini baby sculpt from the tutorials on www.sculptuniversity.com. Apryl Jensen is a sculpting machine!! Staying up late watching her work her magic, and learn a ton of new tricks. Seems like there isn’t enough time in the day!! So much to learn!
new baby in progress!
He looks to me like a boy, but it seems I only tend to sculpt boys. 🙂
The real photoshoot will happen after I sew some clothes that fit him. the boor bubbly is in an oversized onesie.
My husband said he has seen better but I think he’s cute. 🙂 What do you all think?
lost and found
I found this sculpting tutorial on google images today, but with no credit to the original owner. if anyone knows whose work this is, please let me know!

for now, enjoy!!! sculpt some babies!!


